Garden Railroad Outdoor Mountains v2.0
3 years ago we built the outdoor mountains. See my post https://papacarney.com/2017/01/12/building-mountains/ and https://papacarney.com/2017/04/20/mountains-finished/
3 years later, the mountain is showing some wear and tear. Several issues have surfaced since we built it
- Cracks are showing up at certain stress points.
- We have walked on parts of the mountain and several places have fallen through where someone stepped through.
- Several of the plant areas were leaking and showing even more cracks.
- Several of the plant areas were not seen from the main part of the layout
- The plant areas collected leaves, pine needles and other tree droppings that were hard to remove
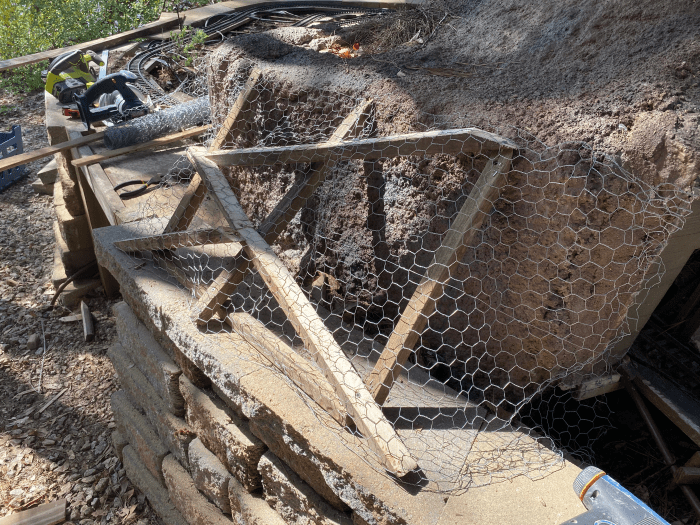
Pictures of the flaws of the original mountain:


After analyzing the design of the mountain it is clear that the original construction could be improved upon. For the original design we built supports and added cross members. The cross members were typically spaced about 6 to 8 feet apart. We added chicken wire with the intent of letting the chicken wire slope into valleys, cliffs, and rock facings. This way the mountain will look more realistic. We added mortar sheets on top of the chicken wire and then sprayed mortar on top of the sheets. With this original design this created 9 different valleys. The valleys just happened because of the location of the support beams. Each valley needed a drainage tube installed and we decided to put in dirt into each of the valley and plant plants into each of the areas. Unfortunately the dirt caused damage to the mortar. In addition, many of the valleys were in places that were not readily seen from the main part of the layout. These valleys captured leaves, pine needles and other yard debris. In addition the valleys attracted weeds that needed to be taken out. Because we let the original design flow and didn’t plan out the locations, several of the valleys were very hard to reach and because of that sides of the mountain got cracked trying to reach those places.
So now 3 years later, we got a second chance to fix the original flaws.
We cut out 5 of the 9 valleys that were not highly visible from the main part of the layout or very hard to access to clean. We then built new cross member supports but spaced them 2 feet apart in most places. The cross member supports sloped down from the top of the mountain and eliminated the valleys. This way the design was a lot more controlled. We designed it with the flow of the water from rain in mind and also access to the dirt areas for weeding, cleaning, and planting. Each valley (now 4) has a drain that is designed with a clean out port and clear plastic piping to see if water is draining correctly. It is important to have a drain in the plant areas to take out standing water which can kill plants.
Construction steps to improve the design of the mountain:


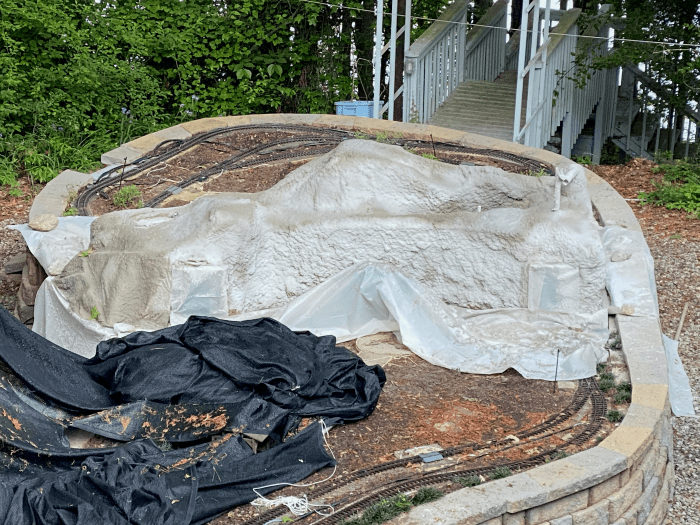


Also during the original construction we had put down the mortar soaked sheets and then there was a gap of time until we were able to spray the mountain. The rain washed some of the mortar off the sheets as there was only a think layer of mortar. To stop this, we put tarps on the mountain after the sheets were put on and before the mortar spraying happened. This left the base intact and stronger.
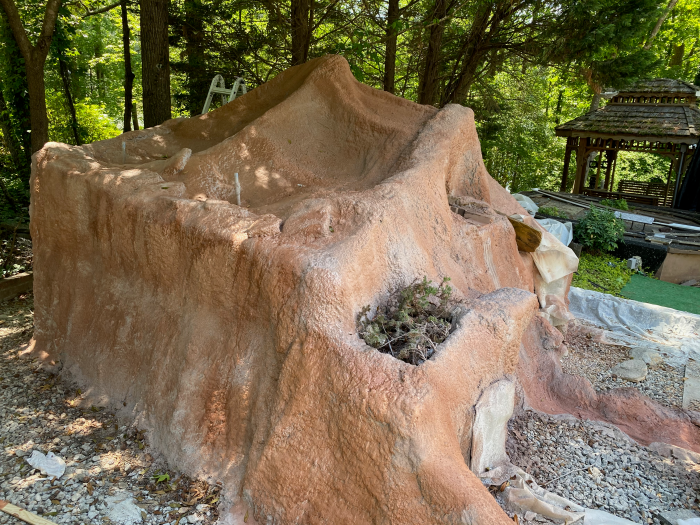
In the original design, we weren’t sure how to paint the mountain and tried several approaches. Now we know that you need a good cement base paint, which is grey. We decided to give the mountain 2 coats of this base paint. The first coat, we used an Elastomer mortar paint. We also used this for a second and third coat in the plant areas that would have standing water. The second base coat of grey was a mortar sealing paint. Then we sprayed the brown and black coloring to give the mountain it’s look. This coloring was a concrete stain that we sprayed on using spray bottles. We did not dilute the stain and sprayed it with different coverages to get a varied look. We also decided to spray a special rubber coating in the areas that will have dirt and plants to protect those areas even more.
In the plant areas, a plastic screen is put over drain, then rock is put on screen to keep dirt from going down drain. Dirt is then put on top of rocks. For the rocks I used Concrete rocks from Hone Depot.
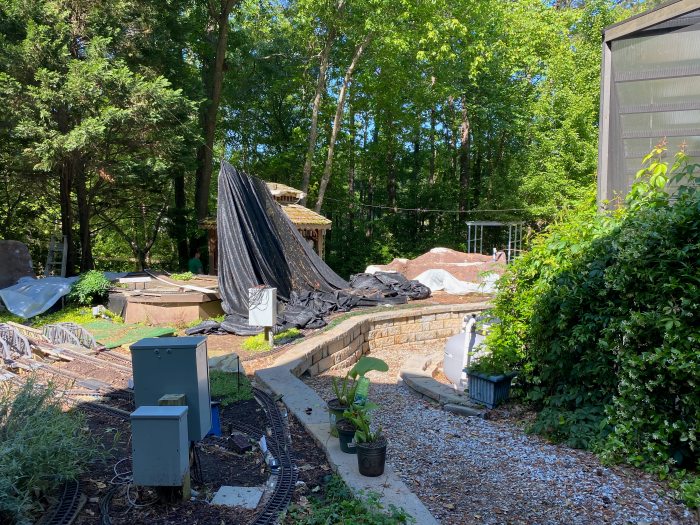
Final Completed Mountains:


