Background
I now have 2 layouts at my children’s houses that utilize full digital and computer control. I have 2 outdoor layouts and I have 2 indoor layouts, one at my condo and one in the basement of my main house.
As I develop the control programs for my grandchildren I have found that they like to control the trains themselves and just don’t want the trains to run in loops. Their preferred method of controlling the trains is buttons.
First Try at a Control Box
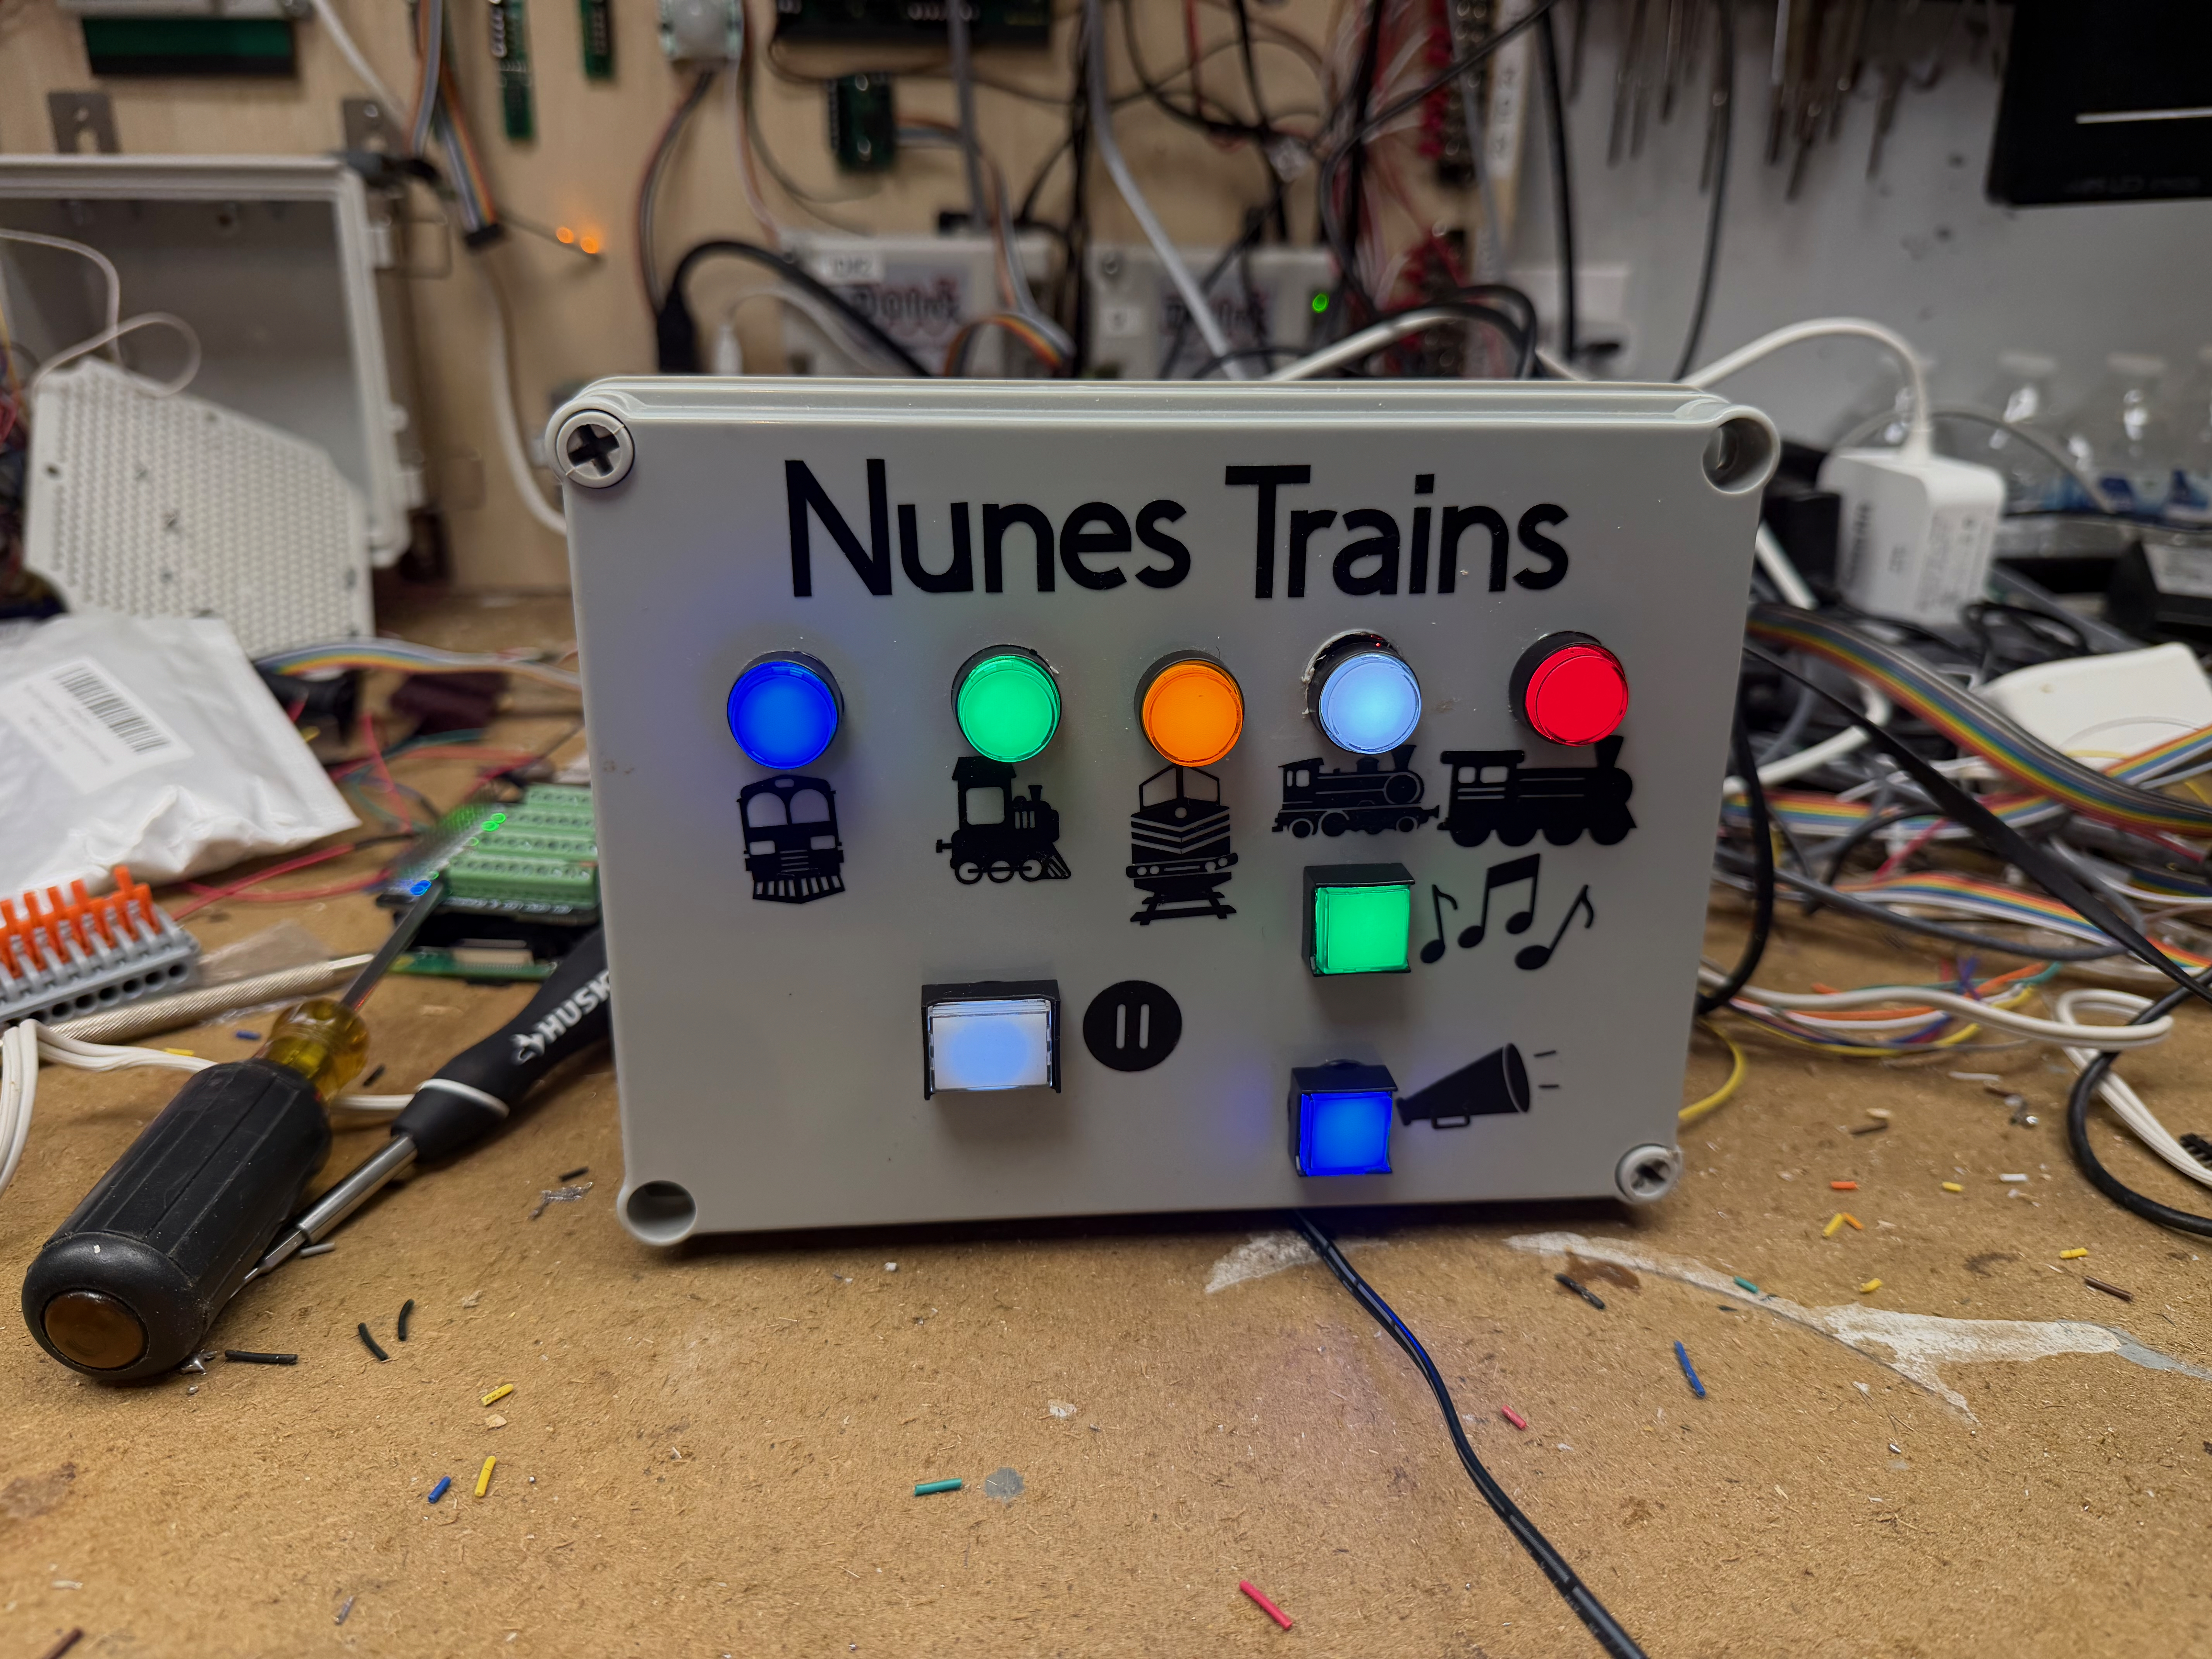
To make it simple my first control box utilized simple pushbuttons. I had 5 buttons that controlled the trains in additional to a run, start, and pause button. The initial program allowed the children to select 1 of 5 programs and then to push the run button, when they were ready for the train to stop they would push the stop button. Now my grandchildren range from 1 year old to 15 year old so the older ones could figure it out the younger ones just pushed buttons.

I then changed the buttons to individual trains running, a pause button, a song button, and a voice button. The program would run the color of the train in a loop and then stop. The grandchildren could then pick a different train to run after the first train stopped. They could pause the train anytime and push the song button if they wanted to play a song or a voice button if they wanted to hear their voice from the train. I utilized Zimo decoders for the sound and engine control and I utilized Digitrax boards (specifically a DS74 and SE74 for the push buttons. They were tied to sensors in JMRI. I wrote several scripts utilized by JMRI (Java Model Railroad Interface) that managed the sensor inputs and changed the function of the buttons as needed. This was a lot better and the train layouts were better utilized by the grandchildren. The new problem was that the grandchildren would keep pushing buttons and not understand when they could use a certain button.
Add LED buttons to Control Box using Digitrax…… Did not Work
I then decided to utilize buttons that were LED lighted. I observed public train layouts that had these types of buttons and when the light came on the button was active. The younger grandchildren responded very well to this type of control box. To utilize the LED buttons, I used the Digitrax DS74 and SE74 for the button inputs and I tried to utilize the SE74 for the LED control. I could never get the SE74 to control the LEDs. The SE74 works with signal lights that are LED only but the LED buttons utilized some different electronics and would not work with the SE74.
Add LED buttons to control Box using Raspberry Pi….. Not the best Solution
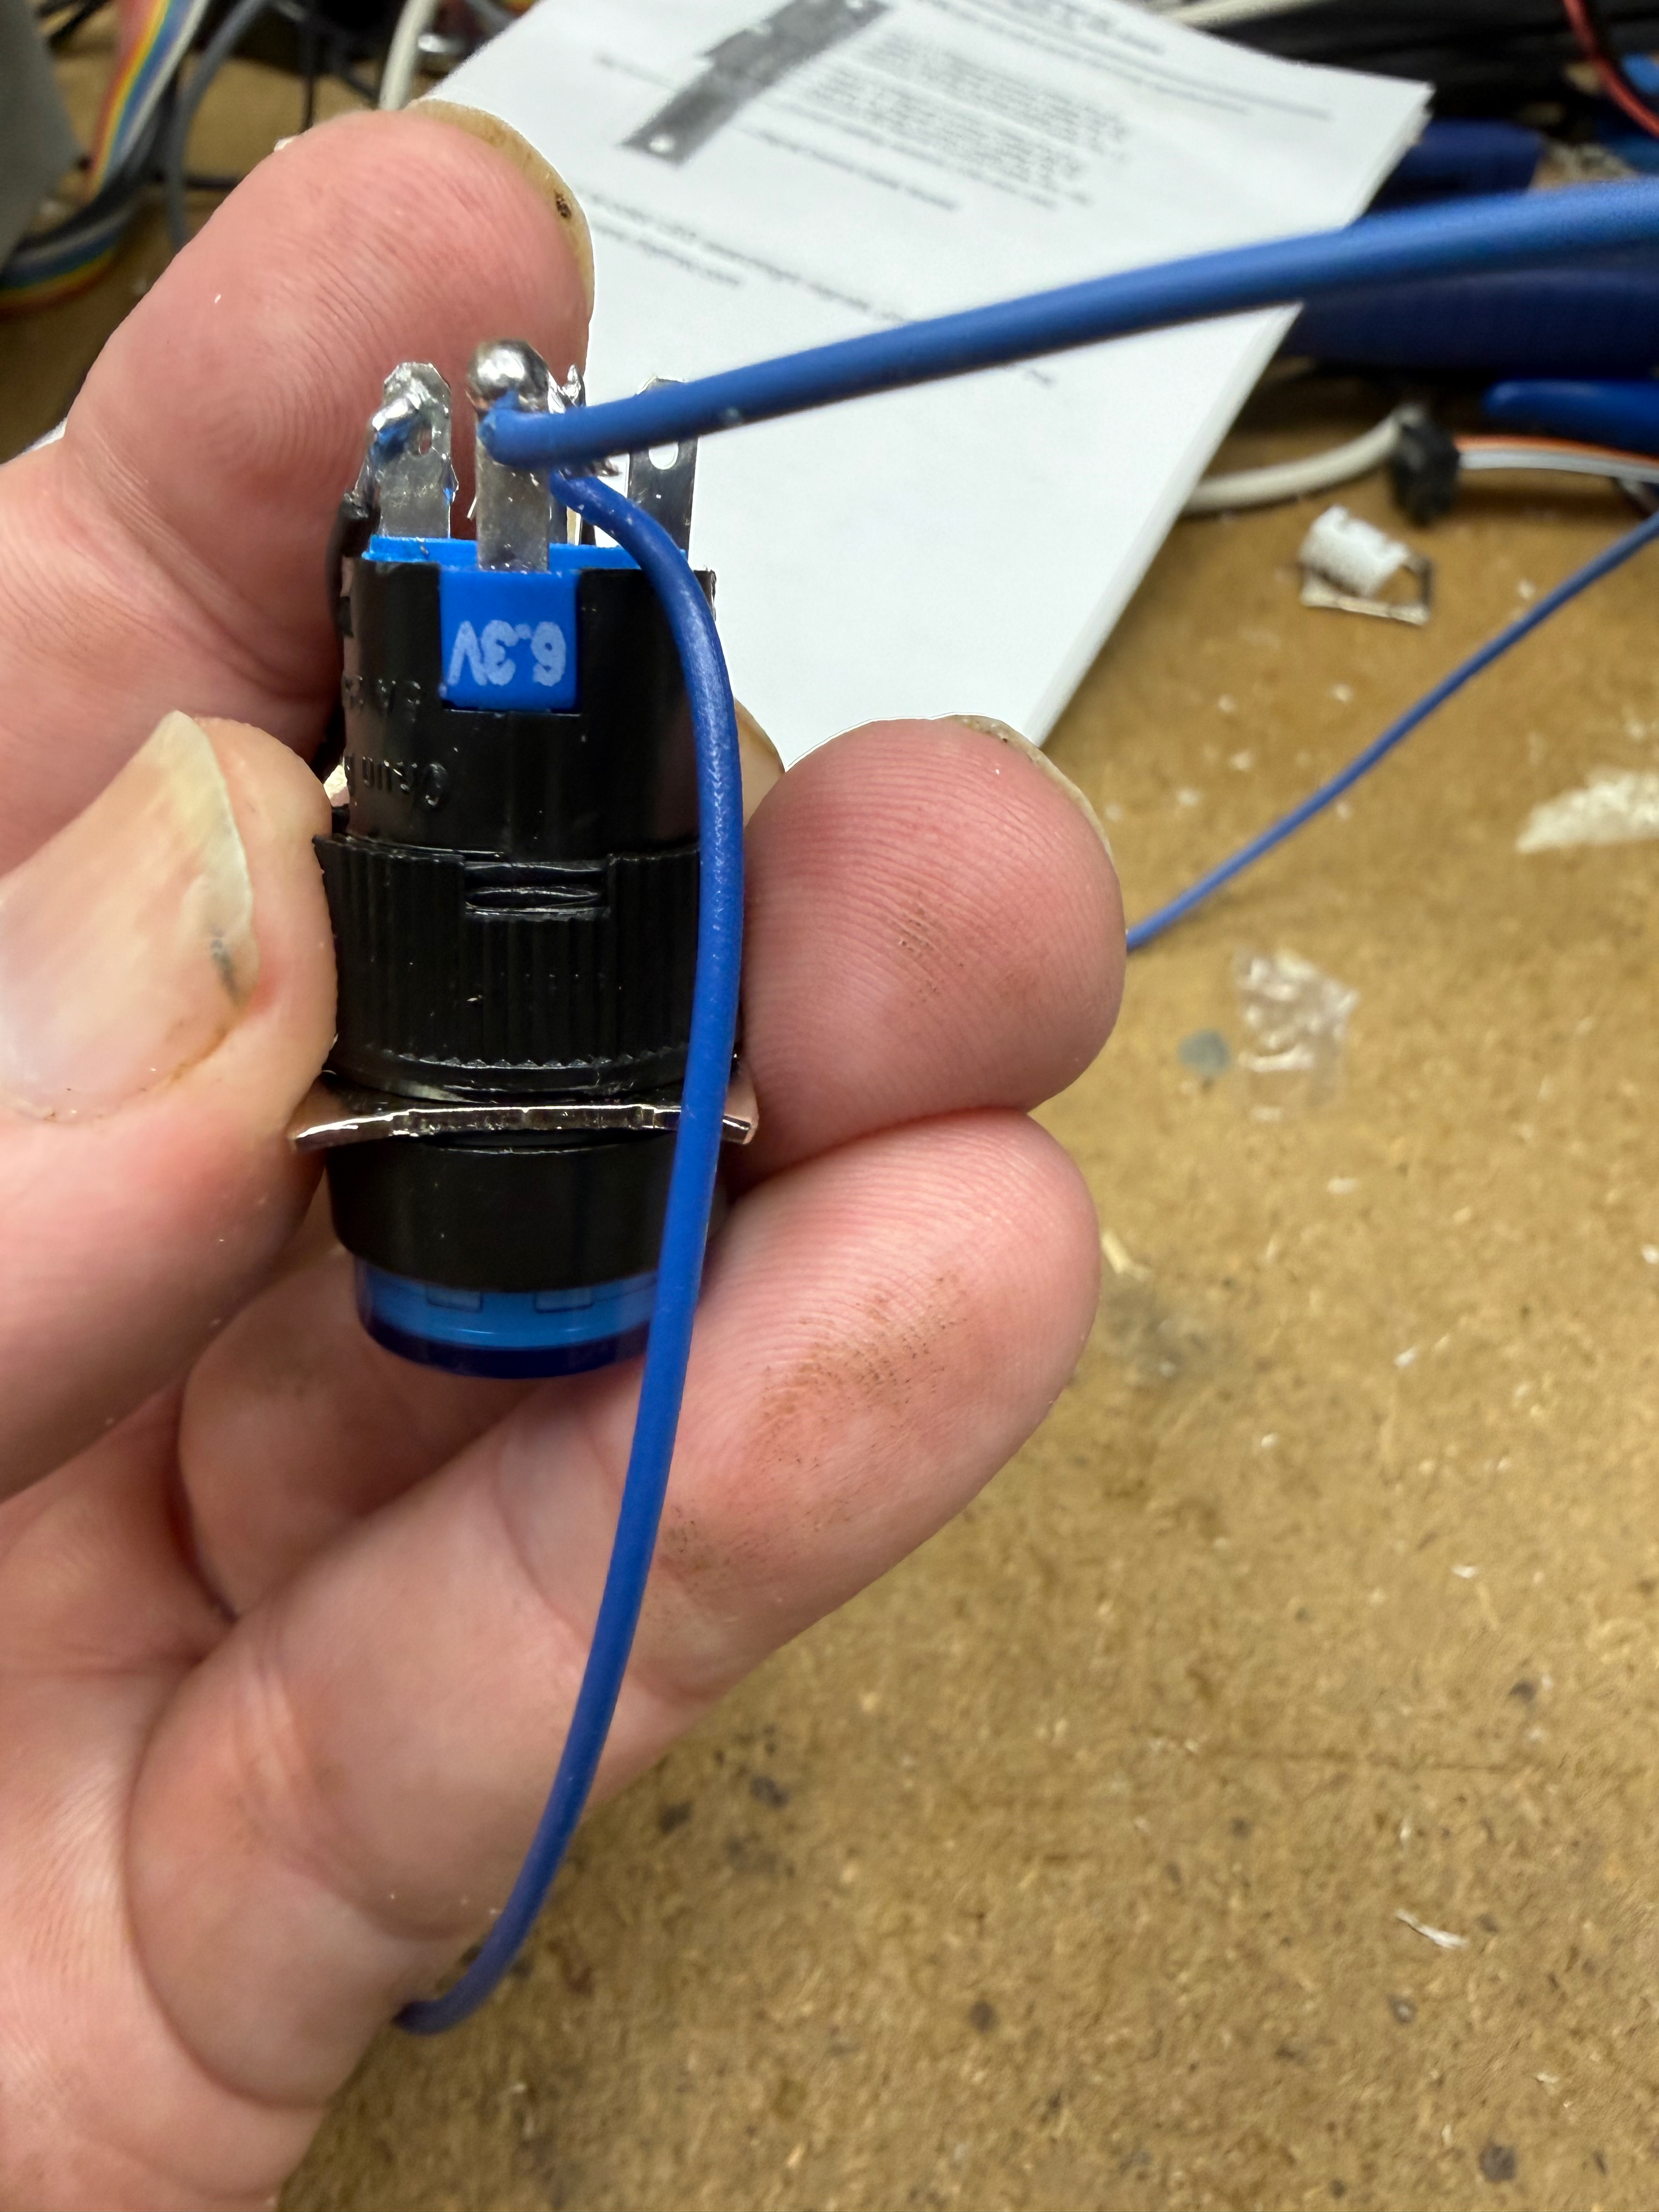
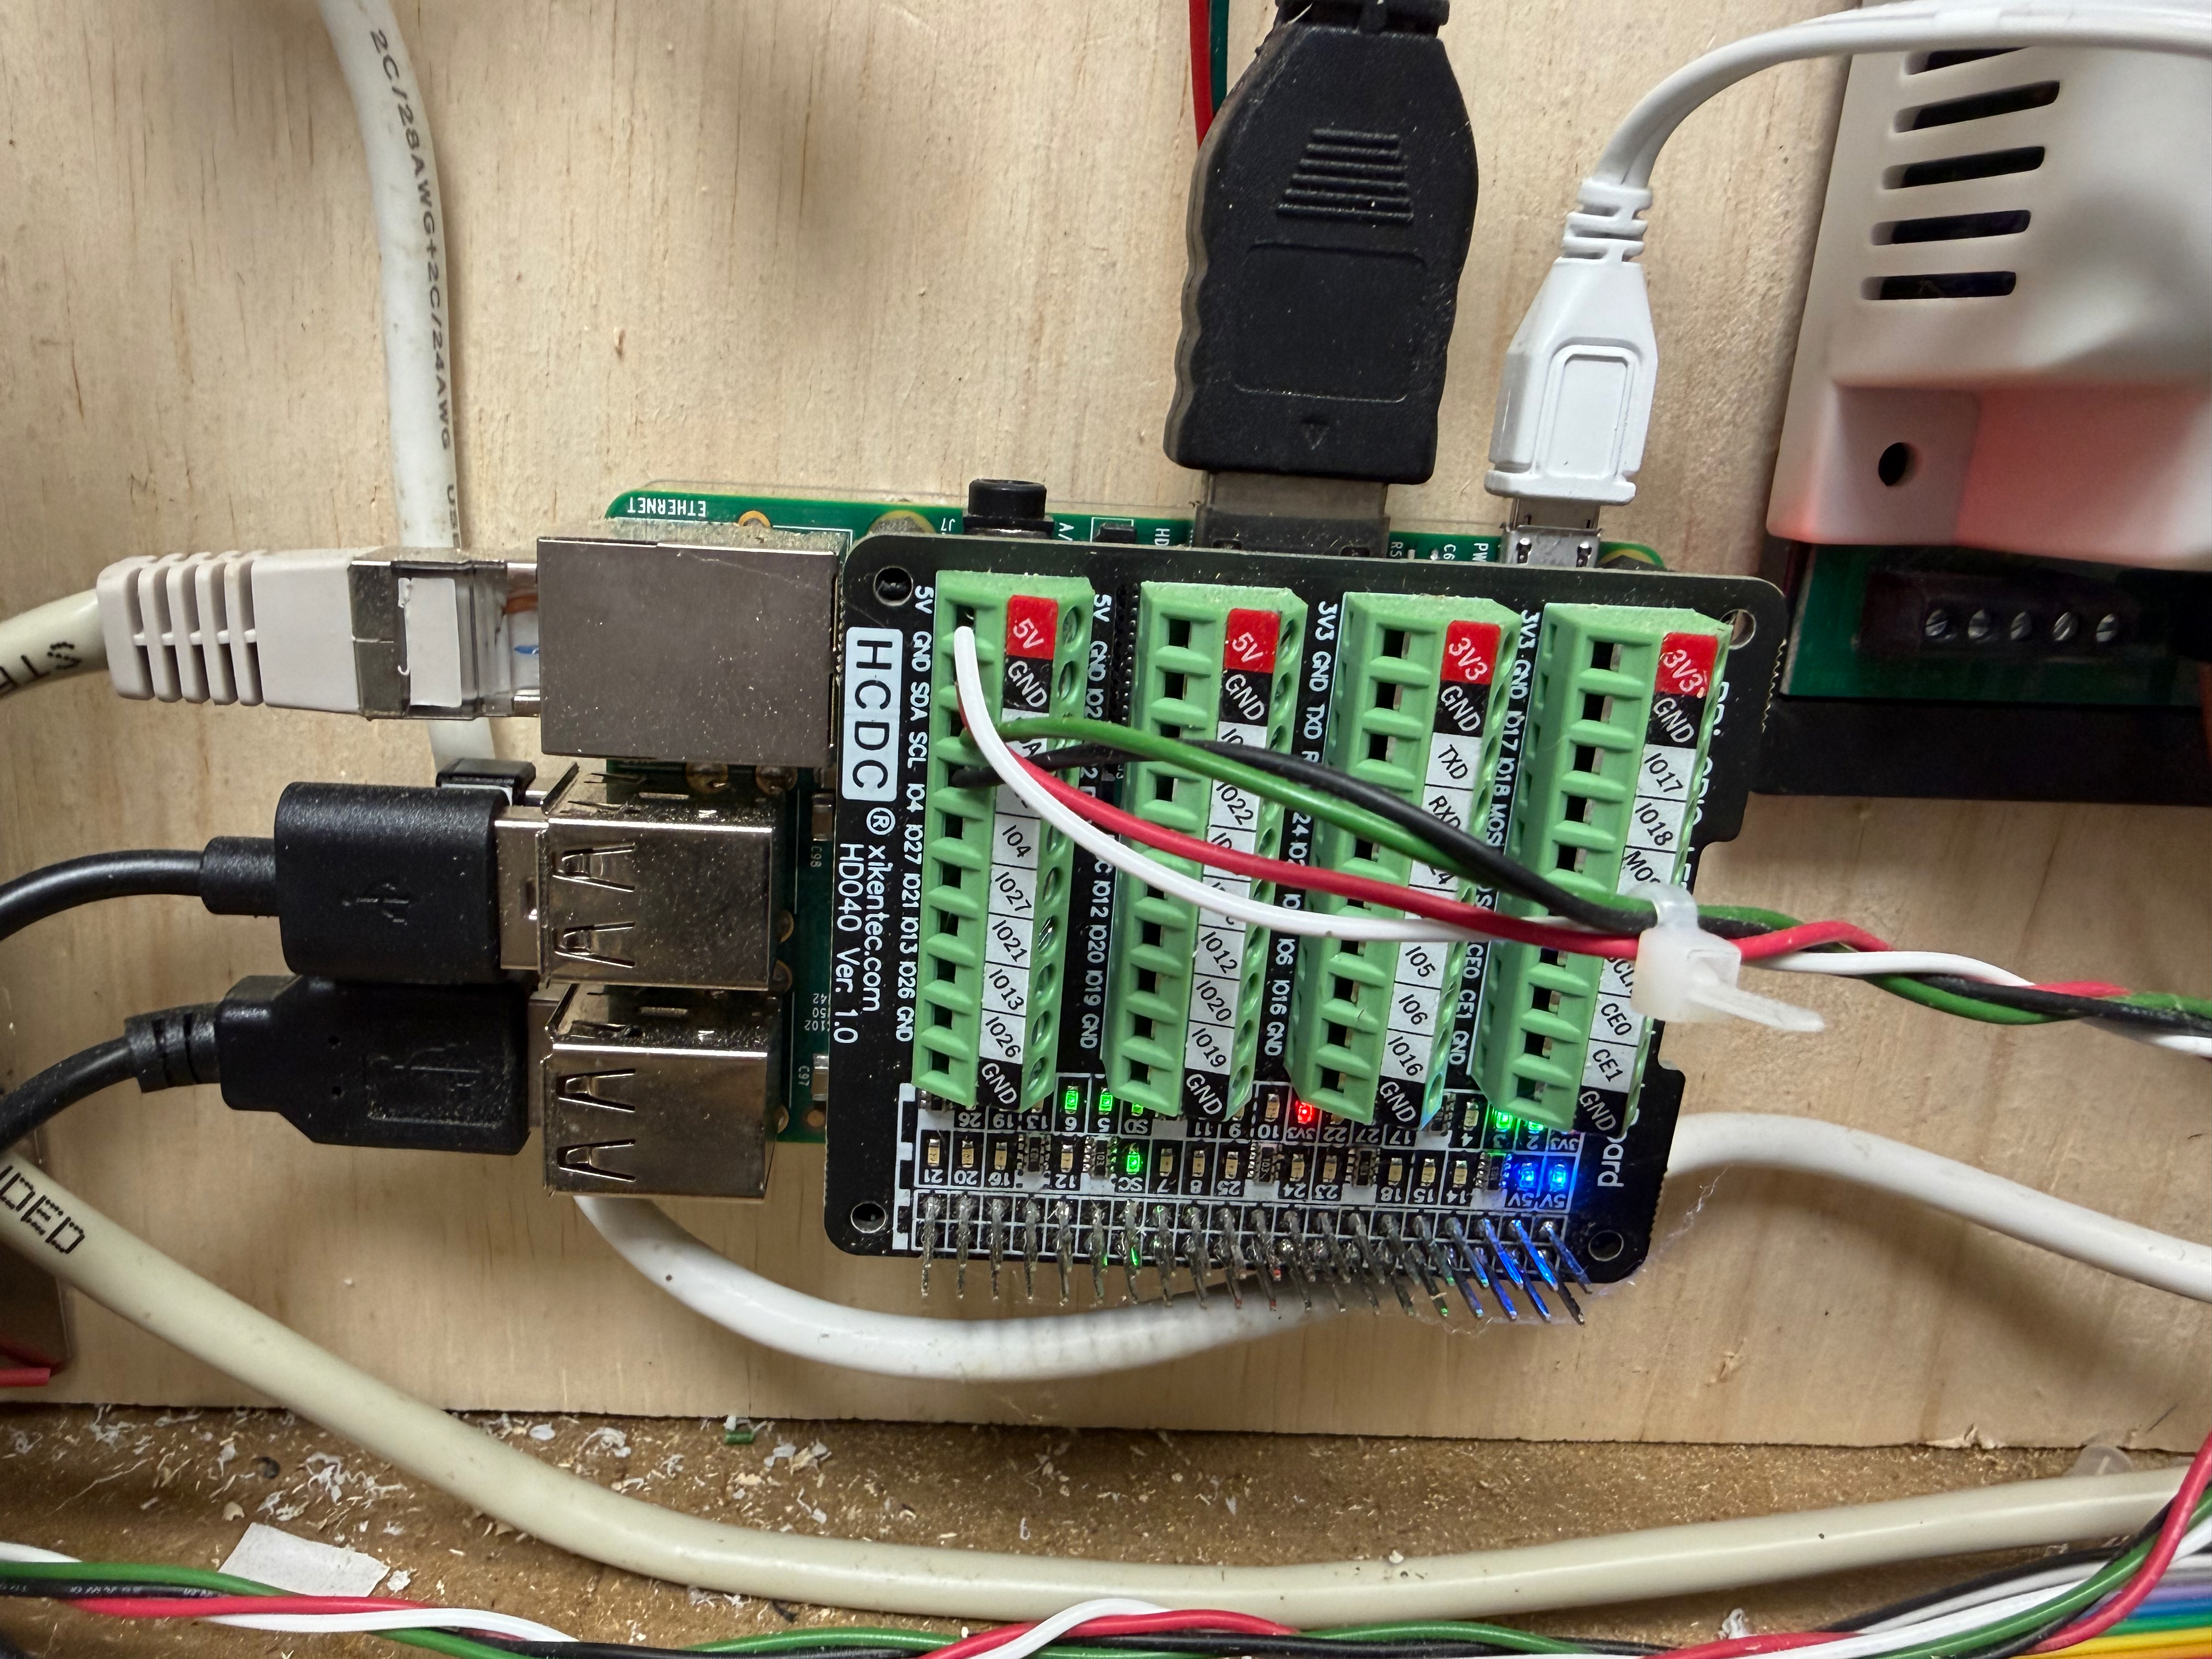
I then decided to utilize the Raspberry Pi GPIO inputs and outputs. This solution had promise as I could directly control the outputs via JMRI Turnouts and the inputs came through on JMRI sensors. I was able to get this version working but it required 3 ribbon cables from the Pi to the control box as well as a cable for the power supply. I utilized a ULN803A Chip to connect the Pi outputs and control the LEDs. The LEDs I was utilizing were 6.3V. While this version worked, I did not like the 3 (8) ribbon cables that were required which limited the control box placement and it had to be in the proximity of the Raspberry Pi, In addition with all the wire connections and stress on the cable sometimes the wires came out.
Utilize ESP32 for the Control Box….. my Preferred Solution
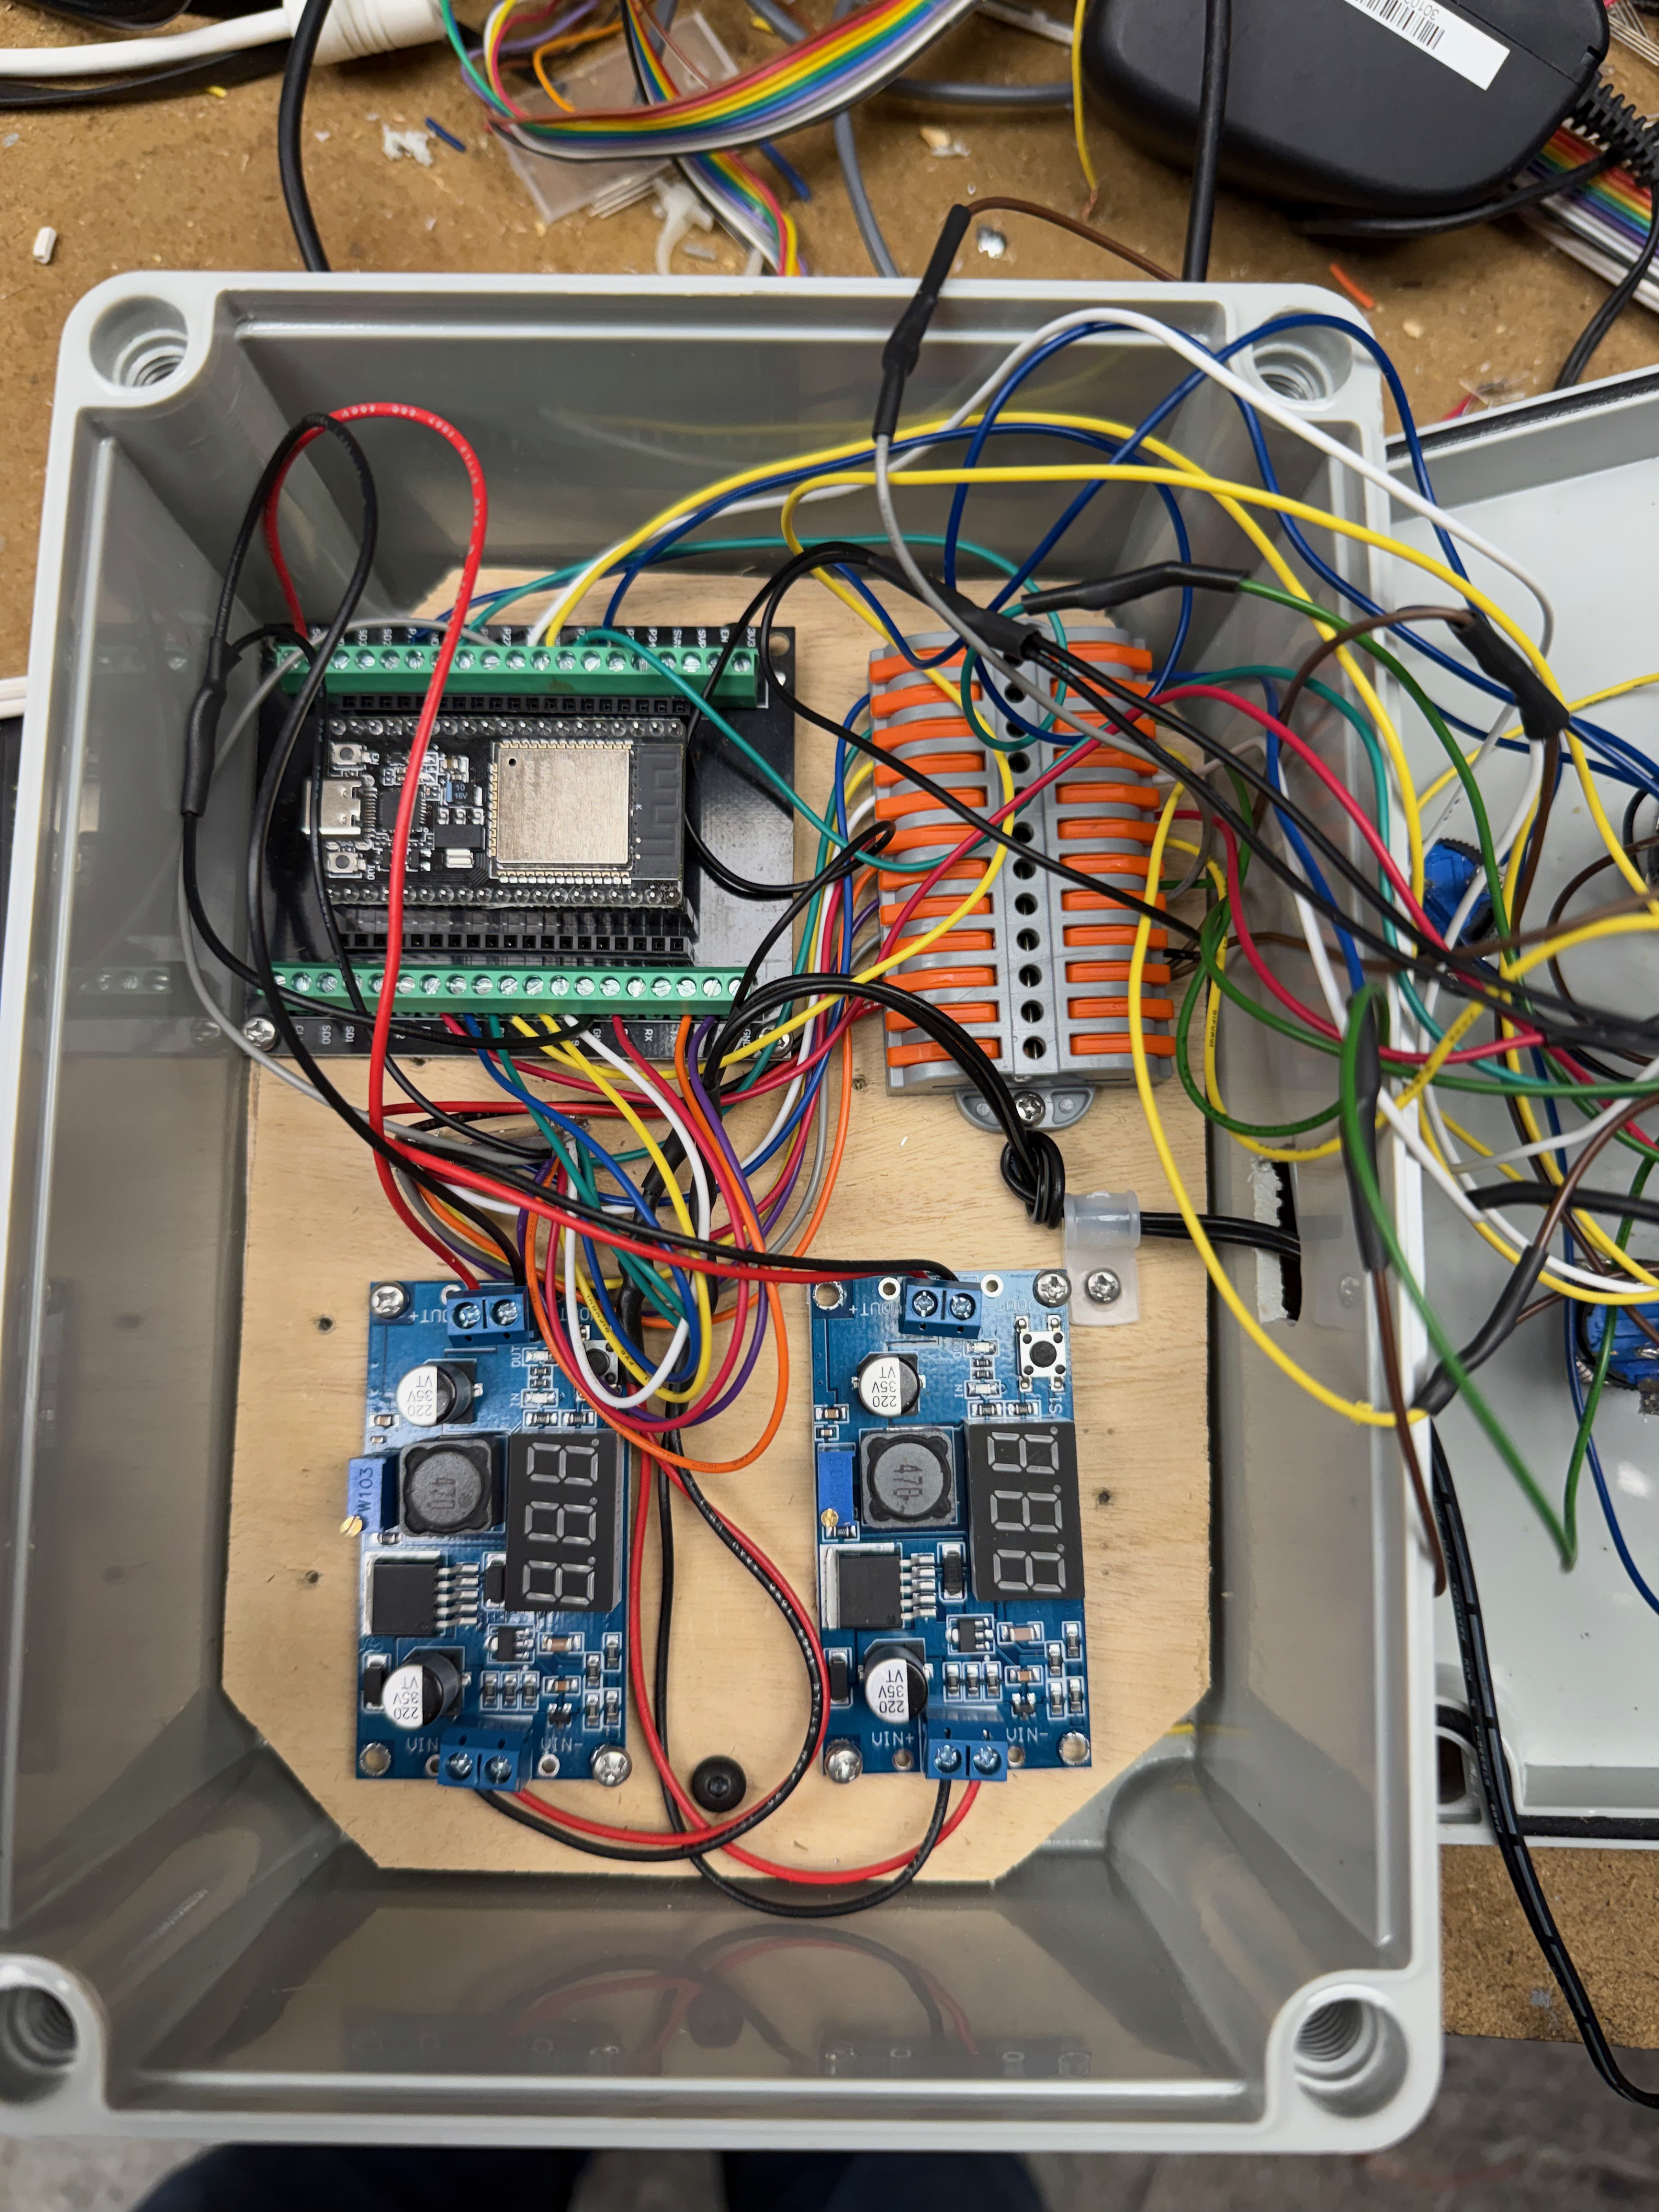
So I tried a different version that utilized a ESP32. This way the only wires needed for coming to the control box was a power cable. The ESP32 was the perfect choice as it had over 8 inputs and 8 outputs and could send MQTT commands to the Raspberry Pi. The inputs came through MQTT to the Pi as MQTTT sensors. I used ChatGPT to write the program for the ESP32. Now I can control the LEDs via MQTT Turnouts and the button come in as MQTT sensors. I again utilized the ULN803A to switch the 6.3v LED buttons via the outputs of the ESP32.

Extensive Testing
I set two sets of my grandchildren on testing the box. Below is a video of them doing extensive quality control. My daughter’s said this is so much better with the LEDs as my grandchildren know which button will do actions and which will not.
Additional Enhancements
I then added a feature to turn off the LED lights when the Raspberry Pi screen sleeps so that the everything goes dark when the trains are not used. You can then push any button and the pi screen turns on as well as the LED buttons. I also added a feature to flash the pause button when needed in the program.

