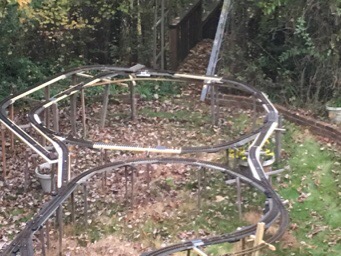
With the help of lot of my children who were home for Christmas and Baptism of Betty Murry we made a lot of progress on the train. After attending some railroad shows last year, I decided to add some additional track that would allow the trains to stop while other trains passed them on the main track and the Notre Dame City area. This would allow additional options when dispatching and prototyping rail lines in the future. We finished laying all of that track and bed to support the tracks. Now all the tracks are completed.

Now we start into the electrical phase of the project. The goal is to create blocks for the track and each block is electrically insulated from the other blocks. This is to provide power to each block and to be able to detect trains within the block and even to identify which locomotive is in the block. This is all connected to the computer which will allow for automated signaling and eventually automated control of the layout. I am using the Digitrax DCC control system for this part of the project. I am wiring up one of the 4 boxes that will house the electronics and will be testing the system to make sure that it performs the way it should and the way that I expect. The first box has been wired up and we are now running the wires to and from the tracks, the signals, and the turnouts. This is a big phase of the project and once everyting is tested out for the first box then we can go ahead and wire up the rest of the track. Haley has really helped with the electronics and Chele has really helped with the wiring. I even got Joe involved in helping to wire. I am using the Digitrax SE8C to control the signals, the signals are made by the South Bend Signal Company (you can see the signals in the pictures below). I am using the Digitrax DS64 to control the turnouts. I am using the Digitax BDL168 and RX4 to control and detect the train blocks. I am using the PS3 to communicate with JMRI on my Macbook Air. Once I get everything tested and working I will blog some additinal details abut the connections, wiring, and how I am using the components.


